
The Masquerade Ball.
The initial seeds for the project were sown in January 2015, just a few weeks after I had been awarded my Associate in Portraiture with the gorgeous Ladybugs.
Most of my macro photography centres around garden insects, gardens and flowers so having completed a panel of insects it made perfect sense to me that the flowers were to be the stars of the Fellowship panel – but how and in what context as I didn’t want them to be similar to the Ladybugs?
Getting the project off the ground.
When it comes to shooting a complete body of work like this I plan everything in advance. I like to envisage every single element, roughly what it will look like and how it will fit with all the other elements. So I knew I wouldn’t get too serious about the project until I had everything mapped out in my head. However, I realised very early on that the project could take a while for everything to fall into place. At the time, I just didn’t appreciate how long!!

Flowers from the Garden.
I had decided from the outset the flowers were to be the stars of the show. It didn’t take long to stumble across the tentative idea of using them to create dresses. I was photography a burgundy Calla Lily from a flower arrangement I’d made at Flower School and for some unknown reason turned it upside down – et voila – a dress was born. But as I have no interest in fashion or trends I had no idea how this would work with other flowers. I spent that Spring and Summer planting and photographing flowers I thought might work as dresses. As for design or style – I still had no idea, so in a folder on the PC the images sat.
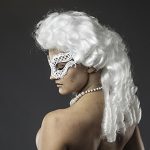 Masked Ladies.
Fast forward slightly to Spring 2016. The epiphany for the dress style and how the ladies would look came unexpectedly on a rare night of watching TV. The series Versailles was on; the flamboyant and sumptuous style of the dresses worn by the 16th Century French courtiers reminded me of the blowsy blooms I had photographed the previous summer. That was it – the dresses were to be styled as ballgowns and the ladies would be Royalty and courtiers going to a masked ball. Hence the title of the Masquerade Ball which in turn became La Boule de Fleur Mascarade.
Cruising for backgrounds.
Now it’s OK for these ladies to be going to a masked ball but locating backgrounds to suit the theme would be a challenge – or so I thought. That summer we were fortunate to go on a Baltic cruise. A couple of days in Copenhagen prior to the start of the trip included a visit to the beautiful Christiansborg Palace, a palace that was built. The rooms were stunning in both grandeur and opulence. And BOOM the backgrounds for my project were right in front of me. Visits to Catherine Palace and Peterhof Palace in St Petersburg on the same trip, both built to rival Versailles, added to the collection and I was a happy camper. A few visits to some of the local stately homes and castles completed the Masquerade Ball scenes I was looking for. Although, I still want to go to Versailles to see the real thing.

The finished look.
This was the hardest part. Putting everything together as a composite was OK but nothing really gelled. I didn’t like the way they looked and was ready to bin the project. I needed something that would blend everything together seamlessly.
It was around this time that I started using Photoshop to create art and had signed up to a course called Photoshop Artistry, which was brilliant. Towards the end I signed up for the follow on course AWAKE and learnt the skills to turn an image into a watercolour painting. Add some sketch strokes and lines and the I’d found the final missing piece of the jigsaw.
Now I could envisage the finished images, the next step was to shoot the models and put it all together.
Putting it all together.
After a model shoot, I would select a few images to work with. Even though I knew they going to be “processed” I still took the time to do my standard minimal retouch on them.
The next step was to create the dress. There was a lot of to-ing and fro-ing, adjusting and manipulating in Photoshop until the flowers looked like a dress and fitted the model. It was then put through Topaz Impressions to give the dress a textured fabric look. I’ll show you how I created some of the dresses in the next post.
With the finished dress back on the model the painting and sketching could begin. Although I’d worked everything out, it still took a lot of tweaking and adjusting before I came up with a look I really liked.
Initially I worked on the model, gown and background composite but it soon became clear that, depending on the room colour and the dress, some areas started to merge. So instead of something quite straightforward I ended up creating an image with the model and the dress plus a standalone image of the background. Both images were then merged and blended to create the final images and just like that, the Masquerade Ball was completed – or so I thought. Talk about doing it the long way round – but worth the hassle I think 🙂

The finishing touches.
After 4 years of planning, shooting, some sleepless nights creating new techniques and here we are. Don’t get me wrong, I love my ladies in all their glory but I wanted to push the boundaries and do something a little different to take them to another level.
Now I’m no artist and have never been able paint or draw in the conventional sense but something made me want to introduce other mediums – to push the boundaries of traditional photography.
I have chosen to embellish the illustrations with acrylic paints to being out some of the details and the background flowers. I have also used Gold Leaf to create some texture on the walls.

The embellishments certainly make them very different to anything else I have ever done and certainly given me some ideas for future images 🙂